By Jacob Tegtman
•
March 27, 2026
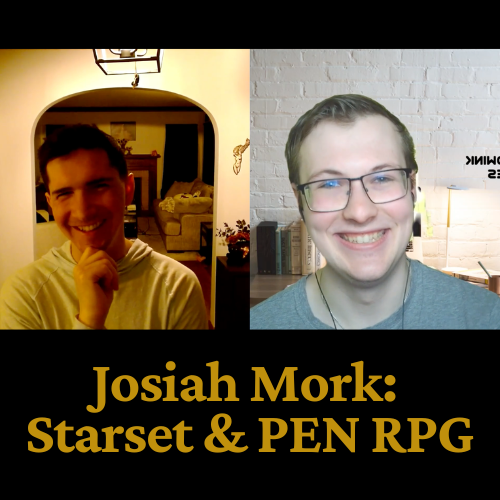
Transcribed content from our recent YouTube video: https://www.youtube.com/watch?v=9In5gaz65s8 Transcription Jacob Tegtman (00:01.848) Hey everyone, welcome back to Eternity TTRPG, where we cover really everything tabletop gaming related, Dungeons and Dragons. Now we're finally jumping into some of my favorite topics, which is game design and getting to spend some time with great game designers up and coming, people who are established. And today we're interviewing Josiah Mork, who is the owner and lead designer for Hoodwink Gaming. So welcome to the show. Thanks for being part of the channel. Josiah (00:33.142) Thanks, it's my pleasure. Yeah, it's been great working with you on eternity and getting to swap ideas. So I'm really looking forward to being able to talk through some of that process with you. Jacob Tegtman (00:44.478) Awesome, Ben. Yeah, I've been looking forward to talking with you. We always have a lot of fun when we catch up. I think this will be a really good conversation. There's so many parts of your mini games that I've wanted to ask you about for really such a long time. And it always felt like we were working on some project or discussing something. But now I have a really good excuse to just nail you down for maybe about an hour-ish and hopefully die. Josiah (00:50.028) for sure. Josiah (01:04.972) There's always something. Jacob Tegtman (01:14.352) dive into what you've been doing and why you've made some of the decisions you've made, which I think are really interesting. I'm sure, yeah. So do you just want to maybe start by introducing yourself more, know, who you are, what you've done, and yeah, where you're going? Josiah (01:20.968) Yeah, well, hopefully I've got good answers for you. We'll see. Josiah (01:32.756) Yeah, absolutely. yeah, like you said, I'm Josiah. I'm from Michigan, living just out of DC now. I've been designing and playing board games since my early teen years, I guess I would say. I love creative writing and storytelling. That's just been an amazing way that I've found to connect with people. My actually my undergrad and my grad degrees were in communication and looking at how communication connects us and strategies and stuff behind it. And so I find a storytelling a really compelling way to do that. But before I had gotten into school and whatnot, you know, I was homeschooled. I was in late middle school and I was reading this cartoon. Maybe you are some of your viewers have seen it. Foxtrot comics. And there are some. Have you seen it? Highly recommend, highly recommend. It's really funny. But there are these two characters, they're really nerdy middle schoolers and they were playing Dungeons and Dragons in the comic. And I just thought that was the coolest thing. But my parents, know, I'm a Christian, my family's Christian, fairly conservative. And so my parents were more familiar with like the 80s, like D &D scare, very like Stranger Things season four. And so they were not really like, yeah, not really D &D fans. And so I was like, well, okay, I'll create my own. And that's how it all got started, you know? And then it was a great way to make friends in my Boy Scout troop. You know, we would play, would swap ideas, we would... Jacob Tegtman (02:51.202) Yeah. Jacob Tegtman (02:55.042) Not too far ahead. Sure. Yeah, that's awesome. Jacob Tegtman (03:08.12) time. Josiah (03:09.972) you know, go on crazy adventures with rules that didn't quite work. And then over time, you know, I just realized that there were all of these cool avenues to explore and storytelling that D &D didn't necessarily do. And so I just felt really passionate that this is my way to connect with people and connect people with each other is through writing games. Jacob Tegtman (03:30.508) That's amazing, man. Yeah, it's funny, like the ways that we get into gaming too. Like you mentioned those comics. you ever see Dexter's Lab? Okay. Okay. Yeah, was probably a little bit before. Yeah. There was like an episode that was kind of based on Dungeons and Dragons and I saw it when I was like six and that's what got me into it as well. yeah. Josiah (03:39.616) Yeah, well, I've heard of it. Yeah, I've seen clips from it, yeah. Josiah (03:52.972) It's so funny how it seems like every show, know, Community, Gravity Falls, like, there are all these shows of every different genre, and they all have like a D &D episode for some reason. And I love it, you know, but it's so random. Jacob Tegtman (03:58.679) Yeah. Jacob Tegtman (04:05.302) Yeah, like all of them. Me too. Yeah, it is. Yeah. I also like the takes that different shows have on like nerdy board games. I think was like Parks and Rec had, I forget what the game was called. Yeah, you remember it. Yeah. Yeah. That's so cool, man. Josiah (04:20.81) The Cones of Dunshire, yeah. Love that, love those episodes. Jacob Tegtman (04:29.646) So I want to dive into really all of those things more, but what games do you currently have available then? And your website will post it in the show notes as well, but it is hoodwinkgaming.com for anybody who's interested. But yeah, tell us about some of your games. And again, I feel like I want to go into all of these in more detail, but yeah, give us the summary version at least for now. Josiah (04:55.05) Yeah, so it's a little deceptive at the moment. My original titles and kind of most of the games that I do are under the pen brand. So play easily now is the acronym. We have war game and role playing game. But actually neither of those are on the market at the moment. If you go to my website. Yeah, we've got a landing page for the war game and we've got a preview for the RPG. And I've actually I've got. Jacob Tegtman (05:12.95) really? I was actually, yeah, I was checking it out like yesterday, so. Josiah (05:24.422) know, prototypes of both of those here. But they are still in development because of various different reasons of wanting to refine some ideas or just kind of ended up having to move to other projects. So they're almost launch ready. But those are the ones that they're working on for the longest, just the newest editions aren't quite together yet. Jacob Tegtman (05:29.506) Yeah. Jacob Tegtman (05:39.96) Yeah, nice. Jacob Tegtman (05:46.04) Very cool. Josiah (05:46.164) And then the one that I've been working on most recently, and that we actually have a new project launching next month for, is Star Set. So that's a grimdark survival-oriented tabletop role-playing game that we launched initially a couple years ago, and then just did a relaunch for the second edition for, which is much more crunchy, much more mechanical, and much more narrative-based. So really looking forward to building that out. Jacob Tegtman (06:14.542) That's exciting. Yeah, I can attest that game is great. I really enjoyed reading through it. Everything from the design of the book to the art to the way that you have, especially character building in that, I find super fascinating. You can just tell, yeah, the amount of attention to detail in there is like out of this world. It really feels like you guys... Josiah (06:27.148) Well, thank you. Josiah (06:34.966) haha Jacob Tegtman (06:38.478) You took the lore of the game and you baked it into every part of the game. Whereas I think a lot of games like, you know, we'll talk about D &D later. D &D is like the game that's everything. So it's like if it's in a fantasy book or movie or anything, like we'll just jam it into D &D somehow. And, you know, that kind of has its place, but for building characters and stuff, you know, like you don't, I don't know. It's supposed to be able to fit many different genres and you're Josiah (06:42.72) Mm-hmm. Jacob Tegtman (07:08.612) I think what's so cool about is that when you're playing Star set you're playing Star set Because from the very first thing you do with your character and their background and their skills even it's all based on the lore of this whole universe so Josiah (07:19.902) Mm-hmm. Well, I really appreciate that. mean, that's really the heart behind it when we were working on it is, we had a story that we wanted to tell and really created the universe to tell that story. And one of the things, you know, that I picked up studying communication is that, you know, we are attracted to details. And even if it's details that, we haven't necessarily experienced in our own lives. Jacob Tegtman (07:24.963) Yeah. Jacob Tegtman (07:33.324) Yeah. Josiah (07:45.324) hearing vivid details or strong emotions in other people's stories lead us to be more connected with them. And so that was something that we really trying to flesh out in Star Set. hopefully, from the sound of it, it hopefully worked pretty well. Jacob Tegtman (08:00.352) I think so, yeah, absolutely. So, what do we talk about first, man? Like, what do you want to talk about first? Josiah (08:01.452) Thank you. Josiah (08:11.672) man, I could talk about games for hours and hours, so I better let you guide that conversation. Jacob Tegtman (08:14.944) You Okay, I just want to make sure we cover like the big things before we dive into the nitty gritty here. Yeah. Yeah. Josiah (08:24.332) Oh yeah, I mean, I kind of touched on, I guess I'll throw it out there. I'll throw it out there because it's really important to me and kind of the company into my story. you know, I really do, we're about to, you know, dig into the nitty gritty, like you said, and Dungeons and Dragons and all the different games that are out there. And I just think, you know, before whether you're a designer or a player, whenever you kind of step into a game, I think the most important thing and what's in the mission kind of a hoodwink that we try and do differently is that Jacob Tegtman (08:33.379) Yeah. Josiah (08:53.446) The games are just kind of an excuse. Really, the games are just an excuse to get together with people and to have FaceTime with people. And if working in social media has taught me anything, it's that people need that more than anything. And that's why we call it Hoodwink Games, because we kind of have all these substitutions. get hoodwinked into thinking that socializing is something that it's not. And really, it's just fellowshipping with people and joining community and FaceTime with people. and talking about the things that matter with people. And the way to do that from going from stranger to best friend is in my experience games. And so that's kind of the heart behind it. Jacob Tegtman (09:30.658) That's been a cool one. Yeah. You know, it's interesting you bring that up too, because this is something I've been thinking a lot about recently, especially as everybody's been seeing more AI come into their work, into their lives. And I feel that more than ever, people are wanting that human, real human interaction. And so as good as video games are looking nowadays and as fun as MMOs are and stuff like that, and I like all of those, I don't think I've Josiah (09:43.628) Mm-hmm. Josiah (09:53.004) Mm-hmm. Jacob Tegtman (10:03.53) found anything that's as fun is sitting around playing a tabletop role-playing game, especially in person. mean, even, you over FaceTime like this is fun, but something in person about it just makes it one of the best experiences. Josiah (10:09.729) video. Josiah (10:13.142) Mm-hmm. Josiah (10:18.686) It really does. It's those shared memories and those shared jokes. And, you know, I work in politics, doing social media for politics. And the thing that just aggravates me the most about politics, but also religion, people say don't talk about politics or religion because people care about it so much. And it's like those are things that we care about the most. So we should be able to share those with people. But you can't because as soon as you bring them up, you know, there are all these walls. Jacob Tegtman (10:39.48) Sure. Josiah (10:48.062) and games when you've played for a couple hours with somebody and slayed the dragon and made a couple jokes, then it's like, well, okay, now your opinion isn't the thing that I'm defining you on. The thing I'm defining you on is that, you know, you're a half drunk elf paladin or something like, and it just makes it easier. Jacob Tegtman (10:48.416) I guess. Jacob Tegtman (11:04.014) Yeah, that's so true. That's so true. Yeah, it definitely does break down those walls and give you that sense of shared history, even if it's like a shared mental history, theater of the mind. So, yeah. Josiah (11:17.27) Mm-hmm. Mm-hmm. It's great. Jacob Tegtman (11:21.428) I agree, man. Especially when you're doing... So I haven't read through all of the lore of Starseq. There's just so much in there. I've read through a good deal of it. But I think one of the things that also stands out about at least that game, because I know Penn's still in the work in progress... Josiah (11:38.599) the Jacob Tegtman (11:39.446) that, you know, it does cover a lot of political things and it covers a lot of religious things and you aren't like pushing a view on anybody, but just inherent to human life is politics and religion. so games let you approach these topics like in ways that allow you to explore what could be, but in a safe way and have conversations about what could be without feeling like you're being attacked or told. Josiah (11:53.856) Mm-hmm. Josiah (12:01.6) Thank you. Josiah (12:05.836) Mm-hmm. Yeah, that's really the, again, I'm really glad that you feel that way about the game, because that was one of the number one priorities of it, is there are just really hard conversations that should be had. And that game kind of came out of COVID, where there were a ton of hard conversations people were having. And I think you could spend every day, every minute of every day with people. Jacob Tegtman (12:14.306) Yeah, for sure. Jacob Tegtman (12:23.394) That's right. That's right. Yeah. Josiah (12:33.664) but if they're not people that you feel like you can have hard conversations with, then you haven't really been in community at all. And so having a medium like that, where, like you said, I don't wanna tell anybody what they should believe. There are things that I believe are true about God and about the world and about politics and stuff, but those things have to exist relationally for them to mean anything to you. so... Jacob Tegtman (12:39.788) Yeah. Jacob Tegtman (12:50.542) Sure. Josiah (12:58.954) to have that space to kind of explore and talk and then role play through just makes it fun for one thing, but also makes it so much more personal and so much more impactful, I think. Jacob Tegtman (12:59.374) Yeah. Jacob Tegtman (13:10.772) I agree. So what is the next thing that you said you're working on with StarCert? I think I missed that when you mentioned earlier. Yeah. Josiah (13:16.436) Yeah, so my co-writer, Emily, and her husband Ryan, who did some of the art for Star Set, they have actually written and illustrated the first campaign for it. It's called Echoes on Mars, and that's going to be launching on Kickstarter next month. Jacob Tegtman (13:31.822) Okay. Okay, cool. That's exciting, man. So what number of Kickstarter will this be for you? Josiah (13:38.092) Thank Josiah (13:42.294) That's Josiah (13:46.806) seven maybe six or seven. I'm doing this one well I should say the plan is to do it on Kickstarter but changing a lot of things. I'm still talking to them. My wife is behind me. I still want to talk through some of them with her because it had a lot of very negative Kickstarter experiences and learned a lot. So we're to do this one if we end up doing it on Kickstarter very slim down and very different than some of the other ones. So it's a constant learning experience. Jacob Tegtman (13:48.43) Sort of. Yeah. Jacob Tegtman (13:54.094) Sure. Jacob Tegtman (14:16.43) Yeah, I just remember I feel like every year or so I feel like you're launching something on Kickstarter successfully. So at least from the outsider's view looking in, it's like man Josiah just knows what he's doing with selling games. Josiah (14:30.208) You Well, I know a little bit more than I did last time and that's the goal. Yeah.
